
How it works
The program guides the operator through five steps. Each step has a clear goal, hints and checks – from loading drawings to exporting for the machine.
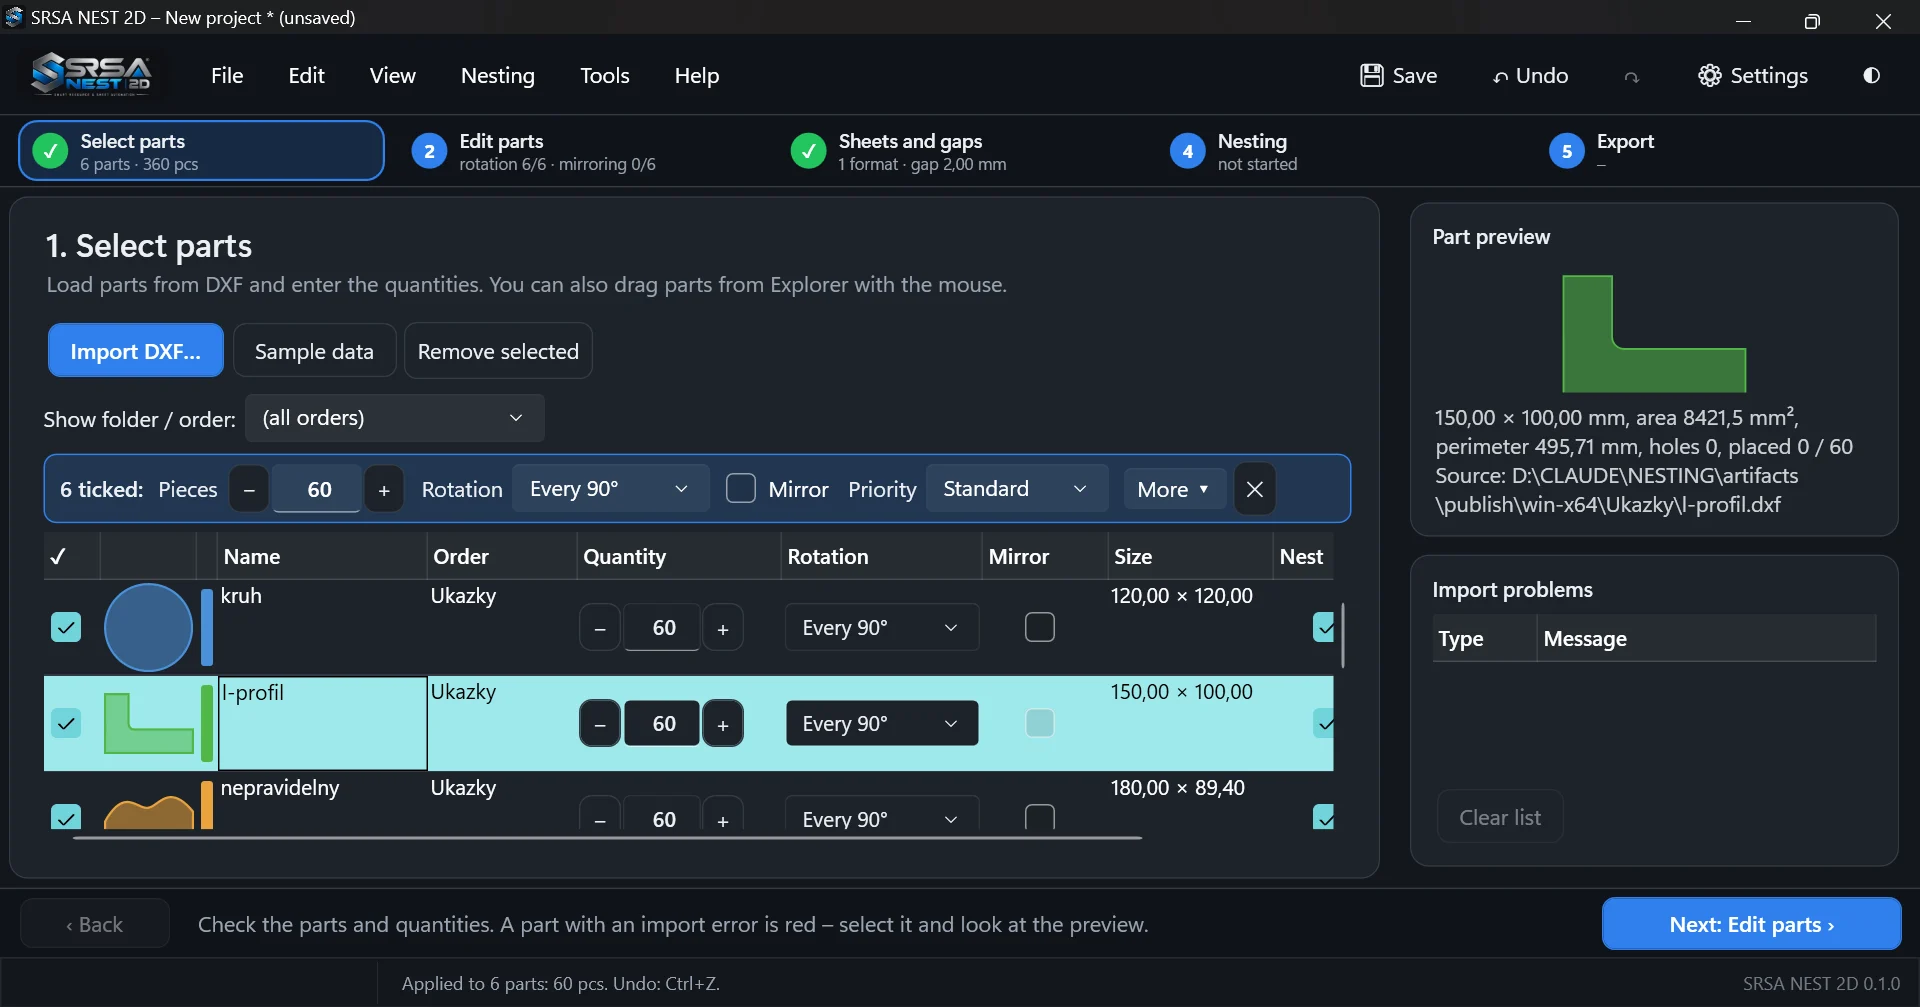
Select parts
Import DXF files or whole folders and enter quantities.
- Import one or more DXF files, or drag files and folders into the window
- Enter quantities with − / + buttons or arrow keys
- Import problems are listed and the part is highlighted with a preview
- Each part remembers its job (folder) for later reports
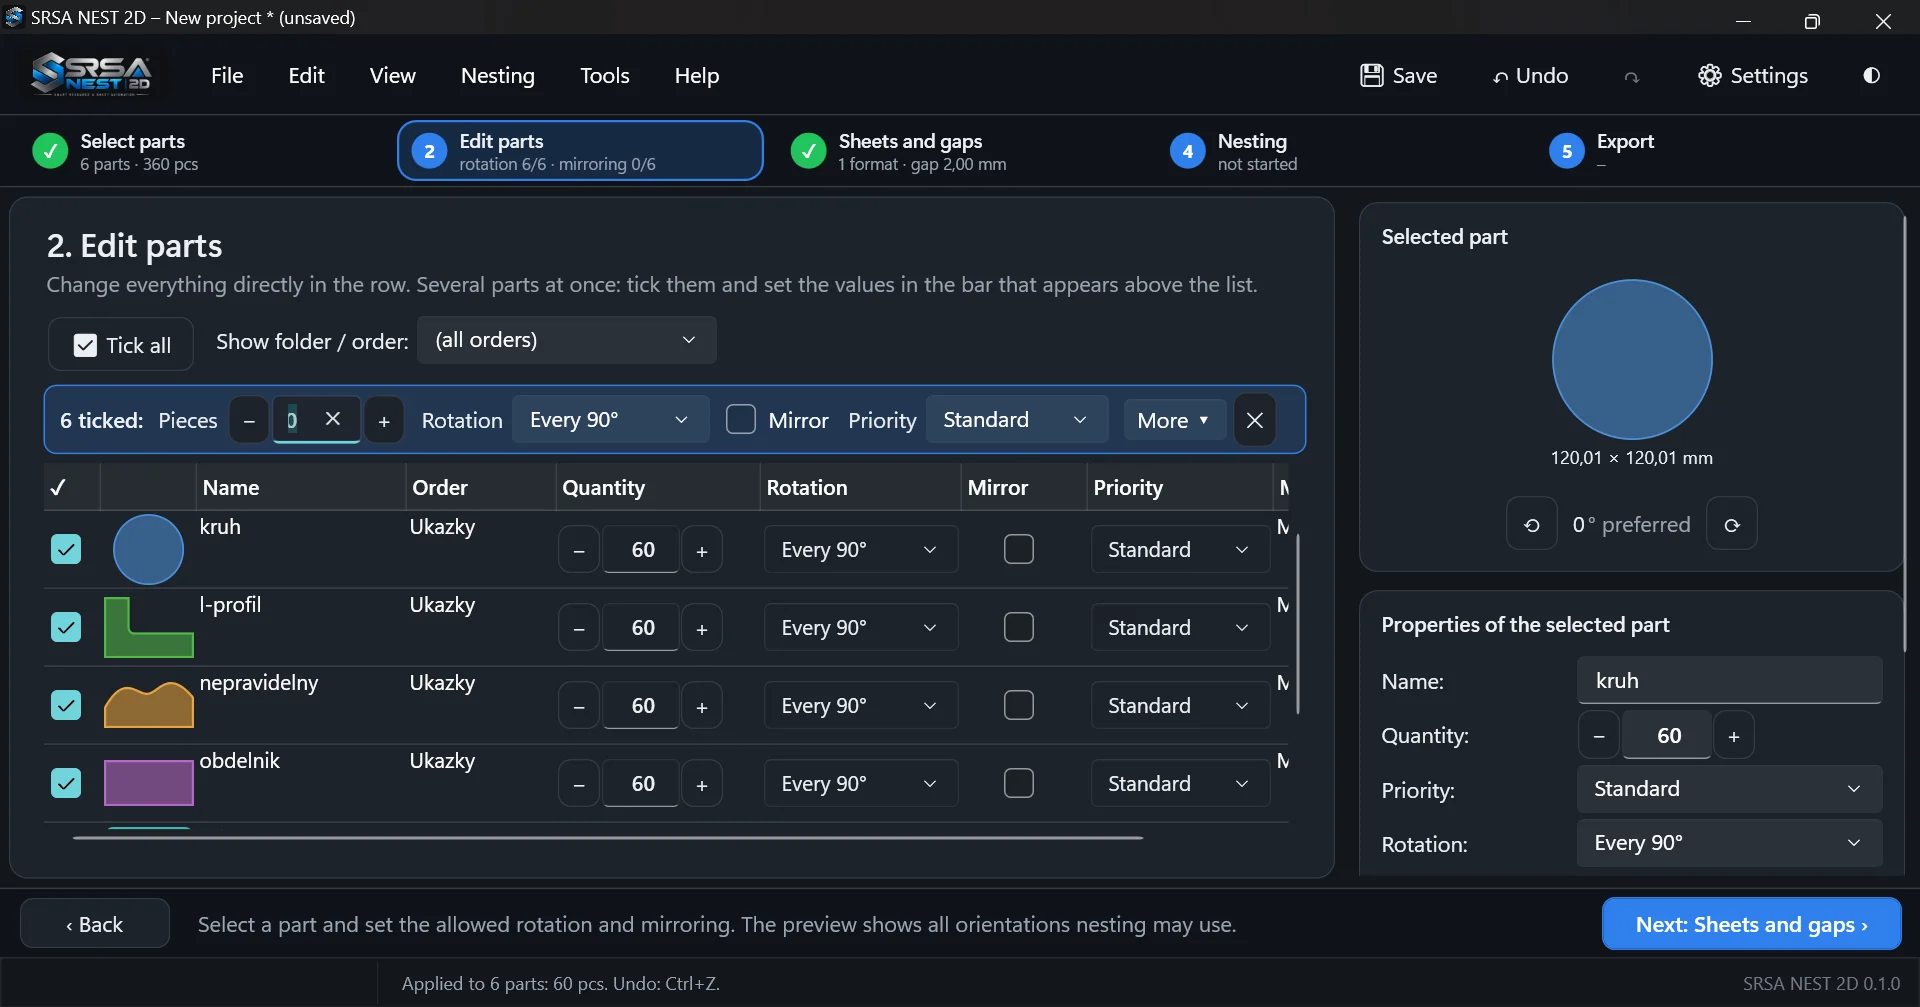
Edit parts
Set rotation, mirroring and priority – for one part or many at once.
- Rotation from “no rotation” to 1° steps, a custom step or a list of angles
- Mirroring and priority Low / Standard / High directly in the row
- Tick several parts and change them at once in the bulk bar
- Material and thickness so parts only go on matching sheets
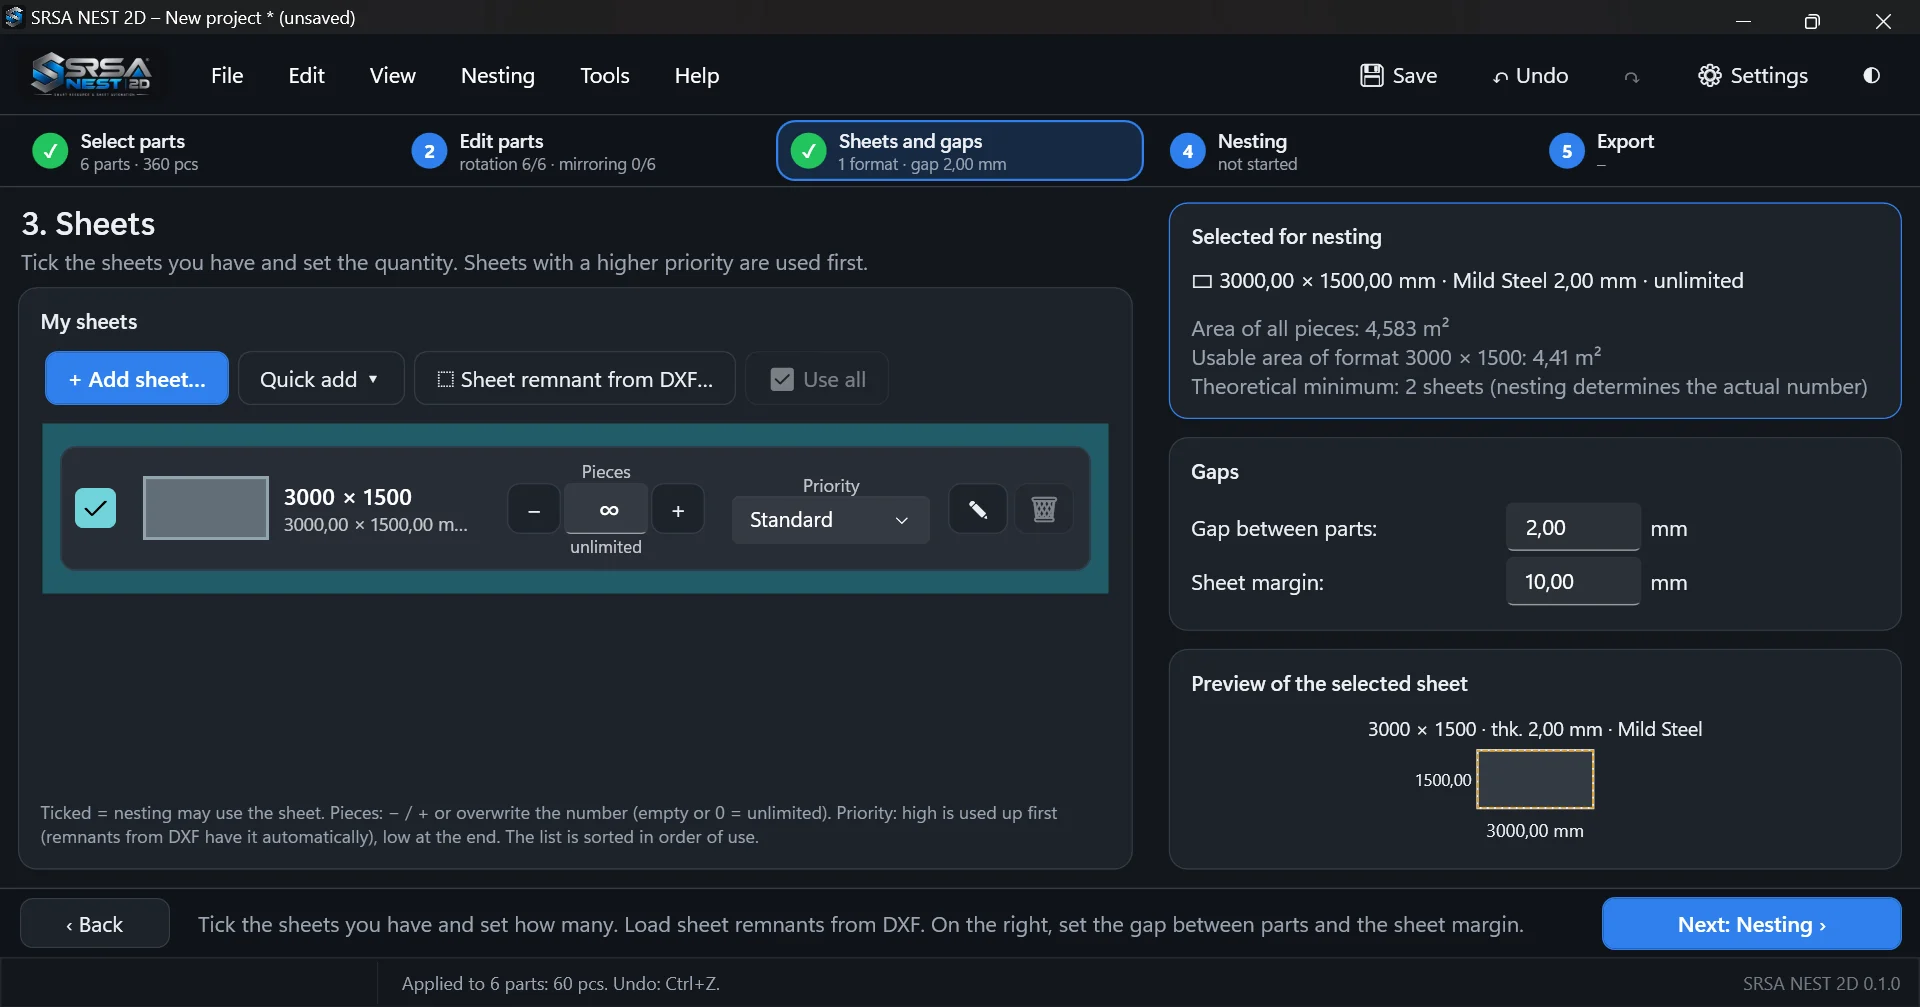
Sheets and gaps
Choose sheet formats and remnants from stock, set gap and margin.
- Standard sheet sizes with one click, any custom size
- Remnants of any shape imported from DXF
- Available quantity and priority for every sheet
- Gap between parts and sheet margin with an instant estimate of sheets needed
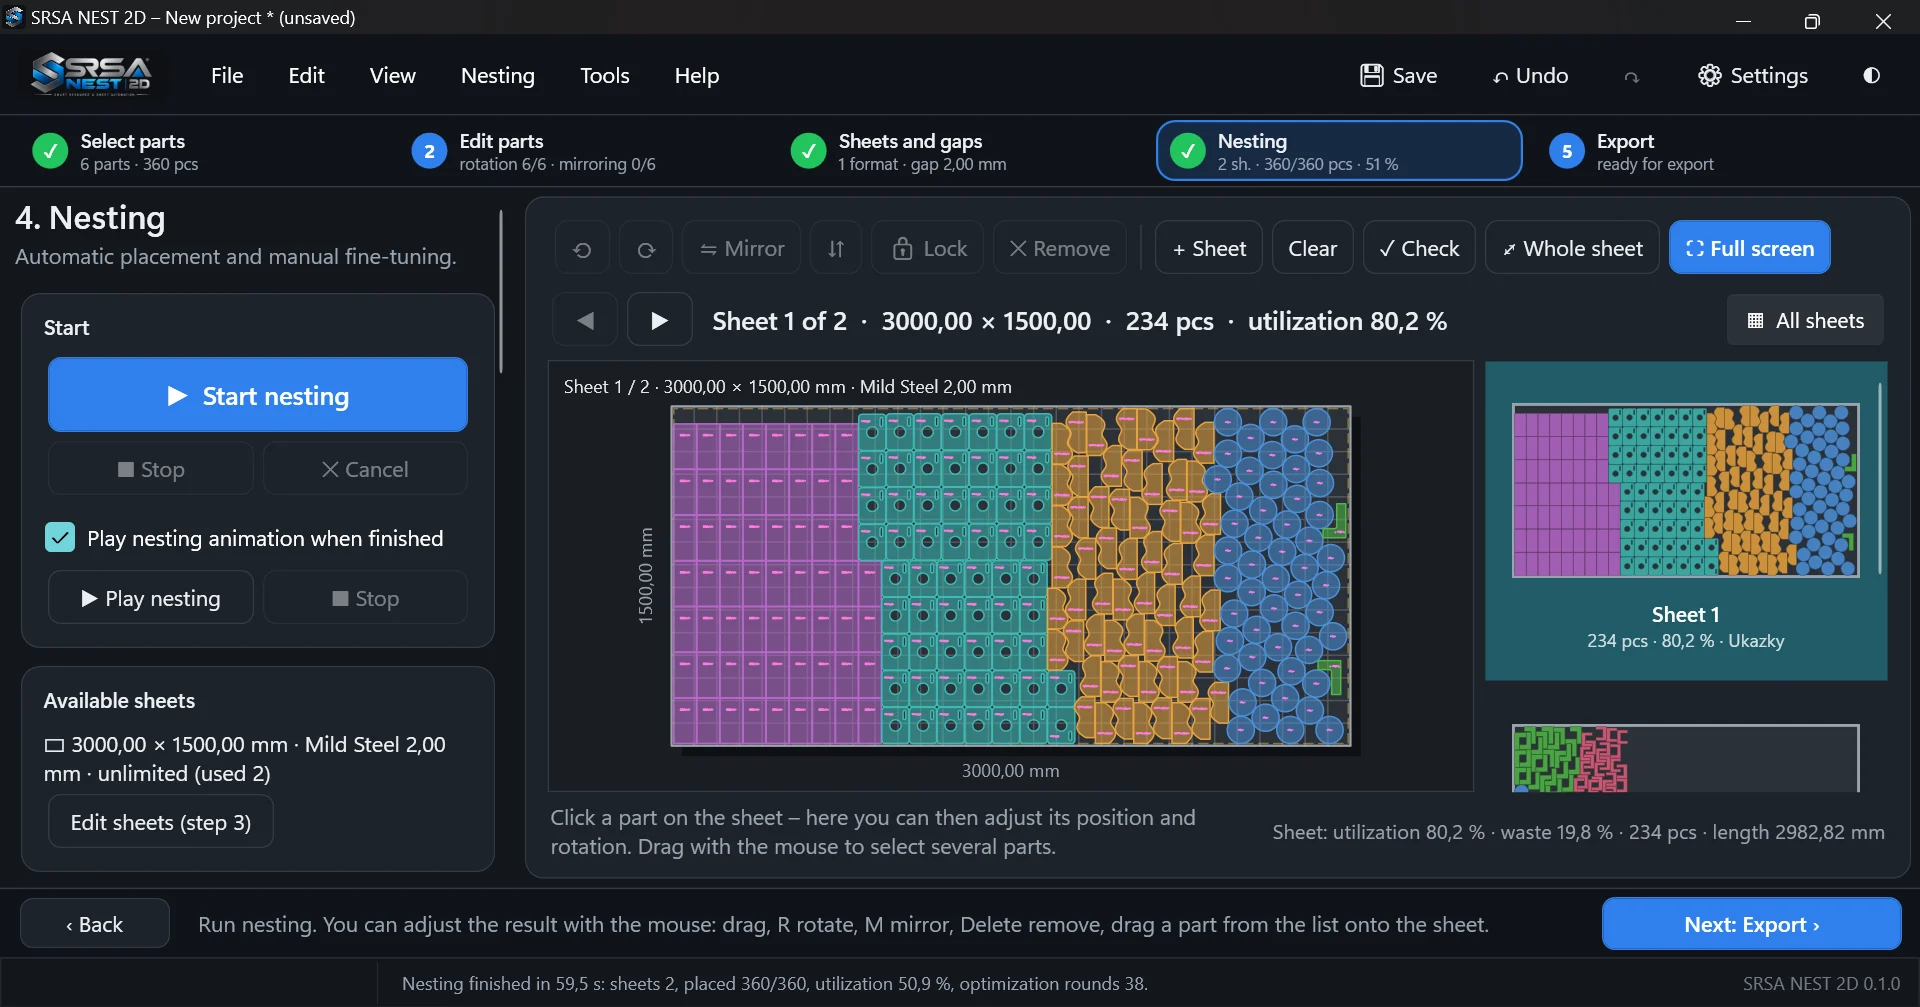
Nesting
Start automatic nesting and fine-tune the result by hand.
- Fast heuristic or optimization within a time limit
- Part-in-part, pairing of shapes and automatic mirroring
- Live progress; stop at any time and keep the best layout
- Manual moves, rotation, locking and collision checking
Export
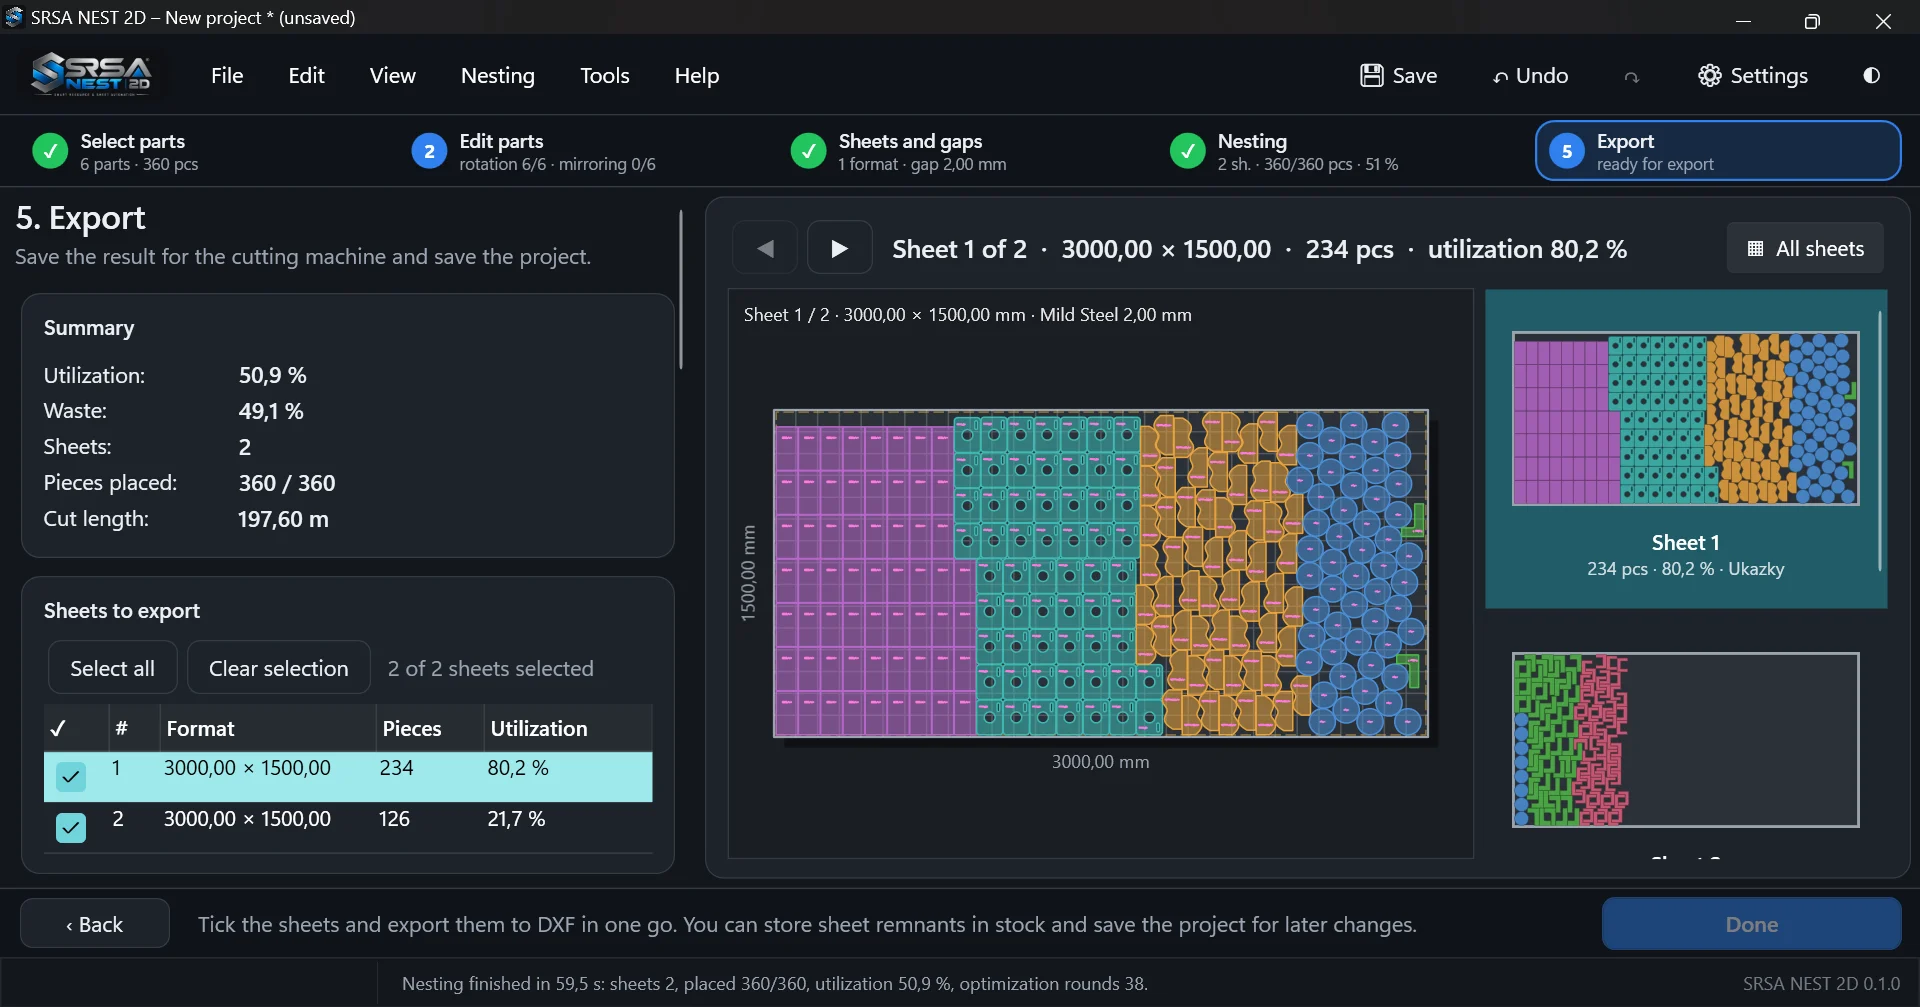
Export DXF for the machine, print the report, store remnants.
- Batch DXF export of the selected sheets, CypCut profile
- Shop-floor report for printing or PDF and CSV for Excel
- Estimated cutting time and price
- Save remnants to stock and the project for later changes
What happens inside the nesting step
A short look under the hood for technologists.
Real shapes
For each pair of parts and orientations the program computes a No-Fit Polygon – the exact area where one part may not be placed next to the other. Placement therefore follows the real outline including holes.
Construction and optimization
A fast heuristic places parts bottom-left on the sheet. The optimization then tries other orders and orientations of the parts and keeps a layout only if it uses fewer sheets or less sheet length.
Safe result
Arcs are approximated so that a part is never smaller than in the drawing, and the final layout is checked for collisions, gaps and margins on the real geometry before export.
Try SRSA NEST on your own drawings
Download the program, import DXF files from your production and compare sheet utilization with your current workflow.